Quantcast
Channel: Brad Chen's SQL Server Blog
Viewing all 62 articles
Browse latest View live

錯誤22002:RegCreateKeyEx()傳回錯誤5,存取被拒(Microsoft SQL-DMO ODBC SQL狀態: 42000)

$
0
0

錯誤22002:RegCreateKeyEx()傳回錯誤5,存取被拒(Microsoft SQL-DMO ODBC SQL狀態: 42000)

SQL Server 2000 
為了符合最低權限要求,通常會將SQL Server與SQL Agent啟動帳戶都改為Local Windows User account,後來再去Enterprise Manager config一些組態設定卻出現此錯誤訊息,回家重新再翻了一下MCSE Training Kit - SQL Server 2000 System Administrator 猜想可能是機碼權限問題,果然解決了,提供給大家參考參考

[狀況]
當設定SQL Server啟動帳戶改為一般local user account或domain user account之後,
再到Enterprise Manager設定SQL Server屬性(組態),將SQL Server或SQL Server
Agent 勾選[自動啟動]就會出現此錯誤訊息


[原因]
使用Enterprise Manager修改SQL Server啟動帳戶,雖然可以將啟動帳戶自動賦予應有的權限,但登錄檔仍須做一些權限修改才能排除此錯誤訊息

[解法]
1.啟動登錄檔編輯器
2.修改前先備份登錄檔
3.找到以下位置
HKEY_LOCAL_MACHINE\SYSTEM\CurrentControlSet\Services\MSSQLServer
若是具名個體
HKEY_LOCAL_MACHINE\SYSTEM\CurrentControlSet\Services\MSSQL$InstanceName

HKEY_LOCAL_MACHINE\SYSTEM\CurrentControlSet\Services\SQLSERVERAGENT
若是具名個體
HKEY_LOCAL_MACHINE\SYSTEM\CurrentControlSet\Services\SQLAgent$InstanceName

4.在以上機碼右鍵,選擇[使用權限]加入一筆新設定SQL Server啟動帳戶,權限設定為[完全控制]
做完後直接在到Enterprise Manager勾選 自動啟動SQL Server,應該就不會再出現錯誤訊息了

SQL Server 2000 xp_cmdshell移除與回復

$
0
0

SQL Server 2000 xp_cmdshell移除與回復

1.xp_cmdshell是一個延伸預存程序,可以讓T-SQL執行shell command
 
2.SQL Server 2000 預設是啟用xp_cmdshell,而SQL Server 2005預設是停用的,可使用 [SQL Server 介面區組態] 將此功能啟用
3.預設值只有System Administrator角色可以執行xp_cmdshell

[安全考量]
雖然預設值只有System Administrator角色可以執行xp_cmdshell,當系統不幸遭遇SQL Injection攻擊,而程式���做進一步的防禦時,而SQL Server安裝時又習慣以本機系統帳戶來啟動SQL Server,此時攻擊者則可以下dir或del等命令取得檔案目錄資訊或刪除檔案等動作,或進一步下net user等命令建立Windows管理員帳戶,或些改OS系統設定,此時等於整台系統都被駭客接管了

因此,如果不需要用到xp_cmdshell,可以考慮將xp_cmdshell移除,以下說明兩種移除法
1.T-SQL Command 移除法
2.Enterprise Manager 移除法(UI圖形介面)

-- [T-SQL Command 移除法]
-- 移除xp_cmdshell, 從SQL Server移除後
-- 更進一步可以把dll檔都刪除,
補充1的命令可以查出dll檔名稱
USE master
GO
EXEC sp_dropextendedproc 'xp_cmdshell'
GO

-- 執行以下命令來測試xp_cmdshell目前是否可用
xp_cmdshell 'dir c:\'

-- 如果將來又需要使用的時候,執行以下回復命令將xp_cmdshell加回來
-- 執行此命令的前提是xplog70.dll檔需存在
USE master
GO
EXEC sp_addextendedproc 'xp_cmdshell', 'xplog70.dll'
GO

-- [補充1]:此命令可以查出xp_cmdshell的dll檔的名稱
SELECT o.name,c.text
FROM dbo.syscomments c , dbo.sysobjects o
WHERE c.id=o.id and o.name='xp_cmdshell'

-- [補充2]:此命令可查出有哪些預存程序仍有用到xplog70.dll檔
SELECT o.name,c.text 
FROM dbo.syscomments c , dbo.sysobjects o
WHERE c.id=o.id and c.text='xplog70.dll'

-- xplog70.dll的預設路徑是
-- C:\Program Files\Microsoft SQL Server\MSSQL\Binn\xplog70.dll


-- [Enterprise Manager 移除法]
Step1.啟動Enterprise Manager
Step2.依照左圖找到xp_cmdshell


Step3.按滑鼠右鍵,選擇刪除


Step4.點選 [顯示依存的情況],此按鈕可顯示目前SQL Server有哪些物件還有用到xp_cmdshell


若沒有顯示任何物件則可進行下一個步驟,若是有顯示依存物件,則需要將依存的問題解決後才進行移除
Step5.點選 [卸除全部]

Listing space used information in each database files

$
0
0

Listing space used information in each database files

-- SQL Server 2000請將 sys.databases改成sysdatabases
-- 第欄是資料使用大小單位是KB

CREATE TABLE #db_space
(
[DBname] NVARCHAR(50),
[Fileid] NVARCHAR(10),
[Filegroup] NVARCHAR(10),
[TotalExtents] int,
[UsedExtents] int,
[Name] NVARCHAR(50),
[FileName] NVARCHAR(300),
);
GO

DECLARE @name sysname
DECLARE cur cursor for SELECT [name] FROM sys.databases WHERE [name] not in ('master','msdb','tempdb','model')
OPEN cur
FETCH cur INTO @name
WHILE @@fetch_status = 0
BEGIN
--Print @name
BEGIN TRAN
INSERT INTO #db_space([Fileid],[Filegroup],[TotalExtents],[UsedExtents],[Name],[FileName])
EXEC('USE '+@name+' ;DBCC SHOWFILESTATS;');
COMMIT TRAN

BEGIN TRAN
UPDATE #db_space SET [DBname] = @name WHERE [DBname] is NULL;
COMMIT TRAN

FETCH cur INTO @name
END
CLOSE cur
DEALLOCATE cur
go
SELECT
[UsedExtents]*64 as [Used KBytes]
,*
FROM #db_space ORDER BY [DBname]
GO
DROP TABLE #db_space
GO


SQL 2000 Determine primary key from system table 列出所有Primary Key

$
0
0

SQL 2000 Determine primary key from system table 列出所有Primary Key

 SELECT object_name(a.[id]) as [TableName]
,object_name(a.constid) as [PK_name]
,b.[name] as [PK_Column]
FROM sysconstraints a inner join syscolumns b
on a.[colid]+1 = b.[colid] and a.[id] = b.[id]
WHERE a.status = 2593

PS. Status=2593還未找到確認的文件說明,另外覆合Key可能不適用

SQLDiag工具程式的使用

$
0
0

SQLDiag工具程式的使用

 
前言:SQLDiag是SQL Server內建的診斷收集共用程式,

[SQL Server 2005]
預設位置:C:\Program Files\Microsoft SQL Server\90\Tools\Binn\SQLDiag.exe
你可以在任何路徑下執行SQLDiag因為此路徑已被加到path系統變數,執行sqldiag -?或sqldiag /?即可顯示參數說明
SQL 2005的sqldiag搭配參數請使用正斜線"/"

SQLdiag
可以收集下列類型的診斷資訊:
Windows 效能記錄
Windows 事件記錄檔
SQL Server Profiler 追蹤
SQL Server 封鎖資訊
SQL Server 組態資訊

http://technet.microsoft.com/zh-tw/library/ms162833.aspx

一般使用:
例如:
sqldiag /O C:\temp\sqldiag
(/O 指定輸出檔案的目錄)
最下方會出現
2008/07/01 00:34:42.82 SQLDIAG
Collection started. Press Ctrl+C to stop.表示正在收集中
在此時按下Ctrl+C即可停止收集收集的資訊會儲存在指定的C:\temp\sqldiag\目錄下,
其中數個log_xx.trc檔是從C:\Program Files\Microsoft SQL Server\MSSQL.1\MSSQL\LOG\路徑下所複製的

進階收集: 修改並指定xml檔,來收集Performance Counter的資訊

[SQL Server 2000]
預設位置:C:\Program Files\Microsoft SQL Server\MSSQL\Binn\SQLDiag.exe
切換目錄到此位置後執行sqldiag -?或sqldiag /?即可顯示參數說明
SQL 2000的sqldiag搭配參數執行要使用"-"
例如: sqldiag -E -O c:\temp\sqldiag.log
(-O 指定輸出資訊到指定的檔案裡)

若要讓SQL 2000可以取得SQL Trace(*.trc)資料,可以利用下面[Sample Code]或KB281671文件範例SQL在master資料庫新增一個名為trace_blackbox的Stored Procedure
KB281671 INF: 預存程序來建立一個 SQL Server 2000 的 blackbox 追蹤
然後在排定時間執行trace_blackbox 1以啟動trace_blackbox,執行期間這個Instance所有連線的SQL Command都會記錄到C:\Program Files\Microsoft SQL Server\MSSQL\Data\blackbox開頭.trc,在必要的時間執行trace_blackbox 0以關閉trace_blackbox,而這些trc檔案都將會被sqldiag所複製並更名到指定的位置

[Caution]
若執行SQLDiag當時trace_blackbox還開著,檔案將無法複製所以SQLDiag.trc會是空的

[Samlp Code]

if exists (select * from dbo.sysobjects where id = object_id(N'[dbo].[trace_blackbox]') and OBJECTPROPERTY(id, N'IsProcedure') = 1)
drop procedure [dbo].[trace_blackbox]

GO
SET QUOTED_IDENTIFIER ON
GO
SET ANSI_NULLS ON
GO
CREATE    PROCEDURE trace_blackbox @on int = 2 AS
/* If no argument is passed to the @on parameter then get the current blackbox trace status.
  If @on is zero then stop and delete the blackbox trace.
  If @on is one then create and start the blackbox trace.
*/
declare @traceid int, @blackboxstatus int, @dir nvarchar(80)
set @traceid = 0
set @blackboxstatus = 0
set nocount on
SELECT @traceid = traceid FROM :: fn_trace_getinfo(0)
where property = 1 and value = 8
IF @on = 0 and @traceid > 0
begin
 select @blackboxstatus = cast(value as int) FROM :: fn_trace_getinfo(0)
  where traceid = @traceid and property = 5
 IF @blackboxstatus > 0 exec sp_trace_setstatus @traceid,0 --stop blackbox trace
 exec sp_trace_setstatus @traceid,2 --delete blackbox trace definition
end
IF @on = 1
  begin
   IF @traceid < traceid =" 0" blackboxstatus =" 0" traceid =" traceid" property =" 1" value =" 8" blackboxstatus =" cast(value" traceid =" @traceid" property =" 5"> 0 and @blackboxstatus > 0
  begin
   select @dir = cast(value as nvarchar(80)) FROM :: fn_trace_getinfo(0)
    where traceid = @traceid and property = 2
   select 'The blackbox trace is running and the trace file is in the following directory.'
   select @dir + '.trc'
  end
ELSE select 'The blackbox trace is not running.'
set nocount off
GO
SET QUOTED_IDENTIFIER OFF
GO
SET ANSI_NULLS ON

 參考資料:
MSDN Library - SQL Server 2005 - SQLdiag 公用程式(繁體中文)
TechNet- SQL Server 2005 - SQLdiag 公用程式(繁體中文)
MSDN Library - SQL Server 2000- sqldiag Utility (英文)


SQLDiag工具程式Bug-Buffer overrun detected

$
0
0

SQLDiag工具程式Bug-Buffer overrun detected

 
當SQL Server 2000升級到SP4之後,SQLDiag.exe工具已被更新到SP4的版本,此版本有個Bug,執行後會出現以下的錯誤訊息:


解決方法1
微軟的KB902955-此Bug已有hotfix,若要取得此hotfix需連絡Microsoft產品支援服務
FIX: 當您執行 Sqldiag.exe 公用程式安裝 SQL Server 2000 SP 4 之後, 您收到 「 取得登錄資訊 」 訊息

解決方法2
將SQLDiag.exe更名,然後從SQL Server 2000安裝光碟將原始的SQLDiag.exe複製出來使用

立即中斷所有SQL Server連線

$
0
0

立即中斷所有SQL Server連線

 
1.針對單一資料庫的連線

範例:將Northwind資料庫設定為只能有一個連線,並中斷其他連線
--中斷Northwind資料庫的所有連線
USE master
GO
ALTER
DATABASE [Northwind]
SET SINGLE_USER
WITH ROLLBACK
IMMEDIATE;
GO

--復原為一般多人連線
USE master
GO
ALTER
DATABASE [Northwind]
SET MULTI_USER
WITH ROLLBACK
IMMEDIATE;
GO

2.針對所有SQL Server連線
(1)查出現有連線,一一刪除
EXEC
sp_who

KILL spid號碼


(2)使用T-SQL 的SURSOR取出所有非系統spid,一次全部刪除

USE master
GO
DECLARE @spid_number
int
DECLARE @sql_text varchar(100)

DECLARE CUR CURSOR FOR
SELECT
[spid] FROM master..sysprocesses
WHERE [spid] > 50 and [spid] <>
@@spid

OPEN CUR
FETCH CUR INTO @spid_number

WHILE
(@@FETCH_STATUS=0)
BEGIN

SET @sql_text = 'KILL ' + CAST(@spid_number
as varchar)

EXEC(@sql_text)

FETCH CUR INTO
@spid_number
END

CLOSE CUR
DEALLOCATE CUR
GO

-- Update on 2009-01-18
3.最快速的方式
(1)SQL Server 2005 - 設定資料庫為單一使用者連線
使用SSMS,針對要進行清除連線的資料庫,進入[屬性]設定的頁面


在左邊點選[選項],再到右下方限制存取項目修改為SINGLE_USER,再按確定


跳出此視窗,按一下[是],即可清除對此資料庫的所有連線


此時資料庫狀態已變成(單一使用者)


或直接用T-SQL

USE [master]
GO
ALTER
DATABASE [AdventureWorks] SET SINGLE_USER WITH NO_WAIT
GO
ALTER DATABASE
[AdventureWorks] SET SINGLE_USER
GO

(2)SQL Server 2000 - 利用卸離Detach資料庫工作
針對要進行清除連線的資料庫,執行卸離資料庫工作


點一下[清除]按鈕,即可清除所有對此資料庫的連線,再按一下取消,來取消卸離detach作業

How to Rename SQL Server Cluster Virtual Server Name(Network name)

$
0
0

How to Rename SQL Server Cluster Virtual Server Name(Network name)

Rename a SQL Server Failover Cluster Instance

http://msdn.microsoft.com/en-us/library/ms178083.aspx 

The name of the virtual server is always the same as the name of the SQL Network Name (the SQL Virtual Server Network Name). Although you can change the name of the virtual server, you cannot change the instance name. For example, you can change a virtual server named VS1\instance1 to some other name, such as SQL35\instance1, but the instance portion of the name, instance1, will remain unchanged.

Before you begin the renaming process, review the items below.

  • SQL Server does not support renaming servers involved in replication, except in the case of using log shipping with replication. The secondary server in log shipping can be renamed if the primary server is permanently lost. For more information, see Replication and Log Shipping.


  • When renaming a virtual server that is configured to use database mirroring, you must turn off database mirroring before the renaming operation, and then re-establish database mirroring with the new virtual server name. Metadata for database mirroring will not be updated automatically to reflect the new virtual server name.

To rename a virtual server

  1. Using Cluster Administrator, change the SQL Network Name to the new name.
  2. Take the network name resource offline. This takes the SQL Server resource and other dependent resources offline as well.
  3. Bring the SQL Server resource back online.
  4. 確認DNS Server上的A Record是否已經改成新的Network Name
  5. 查詢SQL Server系統資料表是否已正確修改成新的Network Name,SELECT @@SERVERNAME; SELECT * FROM sys.sysservers;
  6. Failover Test


前端程式可能需要幾秒鐘或3到5分鐘或更久(depending on network configuration)才能成功連線到SQL
Server。

For connections from any node in the cluster, the new name can be used almost immediately. However, for connections using the new name from a client computer, the new name cannot be used to connect to the server until the new name is visible to that client computer. The length of time required for the new name to be propagated across a network can be a few seconds, or as long as 3 to 5 minutes, depending on the network configuration; additional time may be required before the old virtual server name is no longer visible on the network.

在前端應用程式伺服器(例如Web Server),執行以下命令來減少這個延遲的時間。

To minimize network propagation delay of a virtual server renaming operation, use the following steps:

ipconfig /flushdns

ipconfig /registerdns

nbtstat –RR


Quick to build a testing web site to access SQL Server

$
0
0

Classic ASP
How to access SQL Server in Active Server Pages
http://support.microsoft.com/kb/169377/en-us

ASP.NET 1.1
逐步解說:在 Web Form 網頁中顯示資料
Visual Studio .NET 2003
http://msdn.microsoft.com/zh-tw/library/cc438239(v=vs.71).aspx

Walkthrough: Basic Data Access in Web Pages 
Visual Studio 2005
http://msdn.microsoft.com/en-us/library/tw738475(v=vs.80).aspx

Walkthrough: Basic Data Access in Web Pages
Visual Studio 2008
http://msdn.microsoft.com/en-us/library/tw738475(v=vs.90).aspx

Walkthrough: Basic Data Access in Web Pages
.NET Framework 4
http://msdn.microsoft.com/en-us/library/tw738475(v=vs.100).aspx

Burn an ISO image to physical DVD media with Windows 2008 R2 build-in tool "isoburn.exe"

$
0
0


1.You must have the Desktop Experience pack installed

   必須安裝桌面體驗

2.Windows Server 2008 R2 machines allow only the localsystem\administrator account permission to burn a CD/DVD on the local machine

   必須使用預設的本機管理員帳戶localsystem/Administrator才能在本機燒錄光碟。

3.如果你的登入帳戶不是本機管理員帳戶localsystem/Administrator,則使用以下步驟:

 (1)啟動命令提示字元,切換成localsystem/administrator身分再啟動一個命令提示字元。

     C:\Users\CONTOSO.bradchen>runas /user:administrator cmd

 (2)輸入本機管理員Administrator的密碼之後按確定,就會跳出新的命令提示字元。

 (3)在新的命令提示字元輸入以下命令來燒錄。

     C:\Windows\system32>isoburn /Q D: “C:\en_sql_server_2012_enterprise_edition_x86_x64_dvd_813294.iso”

     PS.以上範例D:燒錄光碟機代號


[Reference]

Windows Server 2008: How to Burn a CD/DVD on WS2K8 R2

http://social.technet.microsoft.com/wiki/contents/articles/133.windows-server-2008-how-to-burn-a-cddvd-on-ws2k8-r2.aspx


Setting Up SQL Server 2008 R2 Database Mirroring step by step

$
0
0

Setting Up SQL Server 2008 R2 Database Mirroring step by step

1.Prepare a Mirror Database for Mirroring

(1)在主體伺服器,對要設定鏡像的資料庫執行完整備份。(Create either a full database backup or a differential database backup of the principal database.)


(2)執行交易紀錄檔備份(Take a log backup)

Typically, you need to take at least one log backup on the principal database.

However, a log backup might be unnecessary, if the database has just been created and no log backup has been taken yet, or if the recovery model has just been changed from SIMPLE to FULL.

(3)將備份檔複製到鏡像伺服器。

 copy backup file to Mirroring Server

(4)在鏡像伺服器,以WITH NORECOVERY參數還原完整備份與交易紀錄檔備份。

Using RESTORE WITH NORECOVERY, create the mirror database by restoring the full database backup and, optionally, the most recent differential database backup, onto the mirror server instance.

還原後資料庫狀態為(正在還原中)(Restoring)


2.開始設定Database Mirroring

(1)在主體伺服器設定主體資料庫屬性

 After connecting to the principal server instance, in Object Explorer, click the server name to expand the server tree.
 Expand Databases, and select the database to be mirrored.
 Right-click the database, select Tasks, and then click Mirror. This opens the Mirroring page of the Database Properties dialog box.

(2)在選取頁面點選[鏡像],右邊點選[設定安全性]

 To begin configuring mirroring, click the Configure Security button to launch the Configure Database Mirroring Security Wizard.

(3)選擇是否要一併設定見證伺服器。

(4)若上一個步驟選擇[否],則不會出現此步驟,此步驟可以取消見證伺服器,等稍後再加入見證伺服器。

(5)設定主體伺服器的端點。

端點名稱可自行命名。(例如DBM_Endpoint)

The Configure Database Mirroring Security Wizard automatically creates the database mirroring endpoint (if none exists) on each server instance, and enters the server network addresses in the field corresponding to the role of the server instance (Principal, Mirror, or Witness).

(6)設定鏡像伺服器的端點。

端點名稱可自行命名。(例如DBM_Endpoint)

(7)設定見證伺服器的端點。

端點名稱可自行命名。(例如DBM_Endpoint)

(8)設定服務帳戶。

 此步驟需要輸入SQL Server的啟動帳戶,設定精靈會是需要建立Login並在端點授予CONNECT權限。

When creating an endpoint, the Configure Database Mirroring Security Wizard always uses Windows Authentication. Before you can use the wizard with certificate-based authentication, the mirroring endpoint must already have been configured to use certificates on each of the server instances. Also, all the fields of the wizard’s Service Accounts dialog box must remain empty. For information about creating a database mirroring endpoint to use certificates, see CREATE ENDPOINT (Transact-SQL).


服務帳戶的相關問題,請參考這篇 Service Accounts and Database Mirroring


(9)完整精靈。

 按一下[完成]


按下完成後就會開始設定。


(10) 關閉精靈之後,就會跳出一個新視窗,讓你決定是否要立即啟動鏡像。

(11)資料庫屬性的鏡像狀態如果還沒有出現”已同步處理:資料庫已完全同步”,可以按一下重新整理。

(12)從SSMS的物件總管的資料庫狀態。

主體資料庫的狀態為(主體,已同步處理)

鏡像資料庫的狀態為(鏡像,已同步處理/正在還原…)

 [Reference]

Prepare a Mirror Database for Mirroring (SQL Server)

http://technet.microsoft.com/en-us/library/ms189053.aspx

Establish a Database Mirroring Session Using Windows Authentication (SQL Server Management Studio)

http://technet.microsoft.com/en-us/library/ms188712.aspx

Setting Up SQL Server 2008 R2 Log Shipping step by step

$
0
0

Setting Up SQL Server 2008 R2 Log Shipping step by step

1.Prerequisites

(1)確認資料庫復原模式recovery model為[完整](Full)或[大量記錄](bulk-logged)

(2)建立一個交易紀錄備份用目錄並設定分享,如果只有兩台SQL Server通常建立在主要伺服器Primary Server上,此目錄也可以建立在第三台主機上。

此範例的目錄建立在主要伺服器上,C:\LogShip

並給予主要伺服器Primary Server的SQL Agent啟動帳戶SQLservice有寫入與讀取權限


(3) 建立一個放置要還原的交易紀錄檔目錄並設定分享,此目錄建立在次要伺服器secondary Server主機上。

此範例的目錄建立在次要伺服器上,C:\LogShipRestore

並給予次要伺服器secondary Server的SQL Agent啟動帳戶SQLservice有寫入與讀取權限


2.Prepare a Secondary Database for Log Shipping

(1)在主要伺服器上對要設定log shipping的資料庫執行完整備份。

(2)在執行一次交易紀錄檔備份。

(3)複製備份檔到次要伺服器。

(4)在次要伺服器,以WITH NORECOVERY參數還原完整備份與交易紀錄檔備份。

還原後資料庫狀態為(正在還原中)(Restoring)


3.開始設定Log Shipping

(1)在主體伺服器設定主體資料庫屬性

(2)在選取頁面點選[交易紀錄傳送],右邊勾選[將此啟用為記錄傳送組態的主要資料庫]

Under Select a page, click Transaction Log Shipping

Select the Enable this as a primary database in a log shipping configuration check box.


(3)點擊[備份設定]。

Under Transaction log backups, click Backup Settings.

(4)在[備份資料夾的網路路徑]輸入之前在主要伺服器所建立的目錄分享的路徑,以下範例為\\SQL2K8R2N02\LogShip,在[如果備份資料價位於主要伺服器上,請輸入至該資料夾的本機路徑]輸入C:\LogShip

  • In the Network path to the backup folder box, type the network path to the share you created for the transaction log backup folder.

  • If the backup folder is located on the primary server, type the local path to the backup folder in the If the backup folder is located on the primary server, type a local path to the folder box. (If the backup folder is not on the primary server, you can leave this box empty.)

    Important noteImportant

    If the SQL Server service account on your primary server runs under the local system account, you must create your backup folder on the primary server and specify a local path to that folder.

  • Configure the Delete files older than and Alert if no backup occurs within parameters.

  • Note the backup schedule listed in the Schedule box under Backup job. If you want to customize the schedule for your installation, then click Schedule and adjust the SQL Server Agent schedule as needed.

  • SQL Server 2008 Enterprise supports backup compression. When creating a log shipping configuration, you can control the backup compression behavior of log backups by choosing one of the following options: Use the default server setting, Compress backup, or Do not compress backup. For more information, see Log Shipping Transaction Log Backup Settings.

(5)在次要伺服器,點擊[加入]。

Under Secondary server instances and databases, click Add.

(6)點擊[連線],連線到次要伺服器。

Click Connect and connect to the instance of SQL Server that you want to use as your secondary server.

(7)在初始化次要資料庫頁籤,選擇一種初始化方式,再次範例我們選擇[否,次要資料庫已初始化]。

On the Initialize Secondary database tab, choose the option that you want to use to initialize the secondary database.

NoteNote

If you choose to have Management Studio initialize the secondary database from a database backup, the data and log files of the secondary database are placed in the same location as the data and log files of the master database. This location is likely to be different than the location of the data and log files of the primary database.

(8) 在複製檔案頁籤,輸入次要伺服器上建立的目錄,此範例為C:\LogShipRestore

  • On the Copy Files tab, in the Destination folder for copied files box, type the path of the folder into which the transaction logs backups should be copied. This folder is often located on the secondary server.

  • Note the copy schedule listed in the Schedule box under Copy job. If you want to customize the schedule for your installation, click Schedule and then adjust the SQL Server Agent schedule as needed. This schedule should approximate the backup schedule.

(9)在還原交易記錄頁籤,選擇復原備份時的資料庫狀態,預設值選擇[不復原模式]則資料庫狀態會維持”正在還原中”而無法存取,如果選擇[待命模式]則資料庫可以唯獨。

  • On the Restore tab, under Database state when restoring backups, choose the No recovery mode or Standby mode option.

  • If you chose the Standby mode option, choose if you want to disconnect users from the secondary database while the restore operation is underway.

  • If you want to delay the restore process on the secondary server, choose a delay time under Delay restoring backups at least.

  • Choose an alert threshold under Alert if no restore occurs within.

  • Note the restore schedule listed in the Schedule box under Restore job. If you want to customize the schedule for your installation, click Schedule and then adjust the SQL Server Agent schedule as needed. This schedule should approximate the backup schedule.

(10)勾選[使用監視伺服器執行個體],點擊[設定],跳出連線到哪一個SQL Server,通常選擇主要伺服器作為監視伺服器。

  • Under Monitor server instance, select the Use a monitor server instance check box, and then click Settings.

    Important noteImportant

    To monitor this log shipping configuration, you must add the monitor server now. To add the monitor server later, you would need to remove this log shipping configuration and then replace it with a new configuration that includes a monitor server.

  • Click Connect and connect to the instance of SQL Server that you want to use as your monitor server.

(11)選擇backup,copy,restore Job連線到監控伺服器的方法,此範例保留預設值即可。

  • Under Monitor connections, choose the connection method to be used by the backup, copy, and restore jobs to connect to the monitor server.

  • Under History retention, choose the length of time you want to retain a record of your log shipping history.

(12)按下確定,就會開始設定Log Shipping。

(13)設定成功。

(14)設定成功後會出現以下幾個JOB,且次要資料庫狀態若選擇[不復原模式],資料庫狀態就會是[正在還原中]。


[Reference]

Configure Log Shipping (SQL Server)
http://technet.microsoft.com/en-us/library/ms190640.aspx

Log Shipping Deployment
http://msdn.microsoft.com/en-us/library/ms188698.aspx


Setting Up SQL Server 2008 R2 Database Mirroring with Certificate step by step in a Workgroup

$
0
0

Setting Up SQL Server 2008 R2 Database Mirroring with Certificate step by step in a Workgroup

LAB VM

Principal Server: SQL2008R2M1

Mirroring Server: SQL2008R2M2

Witness Server: SQL2008R2M3


[Step by Step]

1.Create Database Master key, certificate and endpoint on Principal Instance(SQL2008R2M1)

 USE master
GO
SELECT * FROM sys.symmetric_keys
GO

CREATE MASTER KEY ENCRYPTION BY PASSWORD='P@ssw0rd';
GO

CREATE CERTIFICATE DBM_PRIN_Cert
WITH SUBJECT = 'DB Mirroring Principal Server Certificate',
EXPIRY_DATE = '12/31/2033'
GO

SELECT * FROM sys.certificates;
GO

CREATE ENDPOINT DBM_CERT_Endpoint
STATE = STARTED
AS TCP (LISTENER_PORT = 5022, LISTENER_IP = ALL)
FOR DATABASE_MIRRORING
(
AUTHENTICATION = CERTIFICATE DBM_PRIN_Cert,
ENCRYPTION = REQUIRED ALGORITHM RC4,
ROLE = ALL
)
GO

SELECT * FROM sys.database_mirroring_endpoints;
GO

BACKUP CERTIFICATE DBM_PRIN_Cert
TO FILE = 'C:\Temp\DBM_PRIN_Cert.cer'
GO


2.Create Database Master key, certificate and endpoint on Mirroring Instance(SQL2008R2M2)

 USE master
GO
SELECT * FROM sys.symmetric_keys
GO

CREATE MASTER KEY ENCRYPTION BY PASSWORD='P@ssw0rd';
GO

CREATE CERTIFICATE DBM_MIRR_Cert
WITH SUBJECT = 'DB Mirroring Mirroring Server Certificate',
EXPIRY_DATE = '12/31/2033'
GO

SELECT * FROM sys.certificates;
GO

CREATE ENDPOINT DBM_CERT_Endpoint
STATE = STARTED
AS TCP (LISTENER_PORT = 5022, LISTENER_IP = ALL)
FOR DATABASE_MIRRORING
(
AUTHENTICATION = CERTIFICATE DBM_MIRR_Cert,
ENCRYPTION = REQUIRED ALGORITHM RC4,
ROLE = ALL
)
GO

SELECT * FROM sys.database_mirroring_endpoints;
GO

BACKUP CERTIFICATE DBM_MIRR_Cert
TO FILE = 'C:\Temp\DBM_MIRR_Cert.cer'
GO


3.Create Database Master key, certificate and endpoint on Witness Instance(SQL2008R2M3)

 USE master
GO
SELECT * FROM sys.symmetric_keys
GO

CREATE MASTER KEY ENCRYPTION BY PASSWORD='P@ssw0rd';
GO

CREATE CERTIFICATE DBM_WITT_Cert
WITH SUBJECT = 'DB Mirroring Witness Server Certificate',
EXPIRY_DATE = '12/31/2033'
GO

SELECT * FROM sys.certificates;
GO

CREATE ENDPOINT DBM_CERT_Endpoint
STATE = STARTED
AS TCP (LISTENER_PORT = 5022, LISTENER_IP = ALL)
FOR DATABASE_MIRRORING
(
AUTHENTICATION = CERTIFICATE DBM_WITT_Cert,
ENCRYPTION = REQUIRED ALGORITHM RC4,
ROLE = ALL
)
GO

SELECT * FROM sys.database_mirroring_endpoints;
GO

BACKUP CERTIFICATE DBM_WITT_Cert
TO FILE = 'C:\Temp\DBM_WITT_Cert.cer'
GO


4.Copy Certificate backup file to other SQL Server

  Copy DBM_PRIN_Cert.cer to Mirroring Server and Witness Server

  Copy DBM_MIRR_Cert.cer to Principal Server and Witness Server

  Copy DBM_WITT_Cert.cer to Principal Server and Mirroring Server


5.Create login, user and associate certificate with user on Principal Instance(SQL2008R2M1)

 CREATE LOGIN DBM_MIRR_login WITH PASSWORD = 'P@ssw0rd'
, CHECK_EXPIRATION = OFF, CHECK_POLICY = OFF
GO
CREATE USER DBM_MIRR_User FOR LOGIN DBM_MIRR_login;
GO
CREATE CERTIFICATE DBM_MIRR_Cert
AUTHORIZATION DBM_MIRR_User
FROM FILE = 'c:\Temp\DBM_MIRR_Cert.cer'
GO

GRANT CONNECT On ENDPOINT::[DBM_CERT_Endpoint] TO [DBM_MIRR_login]
GO


CREATE LOGIN DBM_WITT_login WITH PASSWORD = 'P@ssw0rd'
, CHECK_EXPIRATION = OFF, CHECK_POLICY = OFF
GO
CREATE USER DBM_WITT_User FOR LOGIN DBM_WITT_login;
GO
CREATE CERTIFICATE DBM_WITT_Cert
AUTHORIZATION DBM_WITT_User
FROM FILE = 'c:\Temp\DBM_WITT_Cert.cer'
GO

GRANT CONNECT On ENDPOINT::[DBM_CERT_Endpoint] TO [DBM_WITT_login]
GO

6.Create login, user and associate certificate with user on Mirror Instance(SQL2008R2M2)

 CREATE LOGIN DBM_PRIN_login WITH PASSWORD = 'P@ssw0rd'
, CHECK_EXPIRATION = OFF, CHECK_POLICY = OFF
GO
CREATE USER DBM_PRIN_User FOR LOGIN DBM_PRIN_login;
GO
CREATE CERTIFICATE DBM_PRIN_Cert
AUTHORIZATION DBM_PRIN_User
FROM FILE = 'c:\Temp\DBM_PRIN_Cert.cer'
GO

GRANT CONNECT On ENDPOINT::[DBM_CERT_Endpoint] TO [DBM_PRIN_login]
GO


CREATE LOGIN DBM_WITT_login WITH PASSWORD = 'P@ssw0rd'
, CHECK_EXPIRATION = OFF, CHECK_POLICY = OFF
GO
CREATE USER DBM_WITT_User FOR LOGIN DBM_WITT_login;
GO
CREATE CERTIFICATE DBM_WITT_Cert
AUTHORIZATION DBM_WITT_User
FROM FILE = 'c:\Temp\DBM_WITT_Cert.cer'
GO

GRANT CONNECT On ENDPOINT::[DBM_CERT_Endpoint] TO [DBM_WITT_login]
GO

7.Create login, user and associate certificate with user on Witness Instance(SQL2008R2M3)

 CREATE LOGIN DBM_PRIN_login WITH PASSWORD = 'P@ssw0rd'
, CHECK_EXPIRATION = OFF, CHECK_POLICY = OFF
GO
CREATE USER DBM_PRIN_User FOR LOGIN DBM_PRIN_login;
GO
CREATE CERTIFICATE DBM_PRIN_Cert
AUTHORIZATION DBM_PRIN_User
FROM FILE = 'c:\Temp\DBM_PRIN_Cert.cer'
GO

CREATE LOGIN DBM_MIRR_login WITH PASSWORD = 'P@ssw0rd'
, CHECK_EXPIRATION = OFF, CHECK_POLICY = OFF
GO
CREATE USER DBM_MIRR_User FOR LOGIN DBM_MIRR_login;
GO
CREATE CERTIFICATE DBM_MIRR_Cert
AUTHORIZATION DBM_MIRR_User
FROM FILE = 'c:\Temp\DBM_MIRR_Cert.cer'
GO

 GRANT CONNECT On ENDPOINT::[DBM_CERT_Endpoint] TO [DBM_PRIN_login]
GO
GRANT CONNECT On ENDPOINT::[DBM_CERT_Endpoint] TO [DBM_MIRR_login]
GO

8.Prepare Mirroring Database

(1)Backup Principal Database on Principal Instance

 USE master
GO
BACKUP DATABASE MyDB
TO DISK = 'C:\Temp\MyDB_FullBackup.bak'
GO
BACKUP LOG MyDB
TO DISK = 'C:\Temp\MyDB_LogBackup.trn'
GO

(2)Restore Mirroring Database on Mirroring Instance

 USE master
GO
RESTORE DATABASE MyDB
FROM DISK = 'C:\Temp\MyDB_FullBackup.bak'
WITH NORECOVERY
GO
RESTORE LOG MyDB
FROM DISK = 'C:\Temp\MyDB_LogBackup.trn'
WITH NORECOVERY
GO

9.Enable Database Mirroring

(1)Set Partner on Mirroring Instance (SQL2008R2M2)

 ALTER DATABASE MyDB
SET PARTNER = 'TCP://SQL2K8R2M1:5022'

(2)Set Partner and Witness on Principal Instance (SQL2008R2M1)

 ALTER DATABASE MyDB
SET PARTNER = 'TCP://SQL2K8R2M2:5022'

ALTER DATABASE MyDB
SET WITNESS = 'TCP://SQL2K8R2M3:5022'


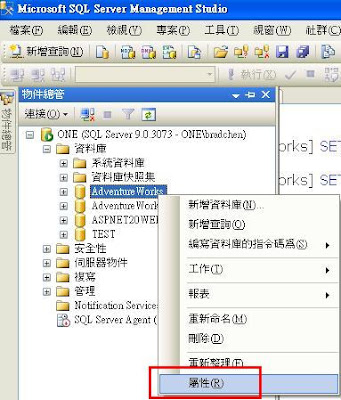
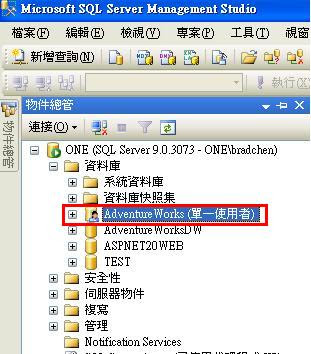
10.Database Mirroring Status

[Reference]

Allow a Database Mirroring Endpoint to Use Certificates for Outbound Connections (Transact-SQL)

http://msdn.microsoft.com/en-us/library/ms186384.aspx

Step-by-step
guide to configure Database Mirroring between SQL Server Instances in a
Workgroup

http://blogs.msdn.com/b/suhde/archive/2009/07/13/step-by-step-guide-to-configure-database-mirroring-between-sql-server-instances-in-a-workgroup.aspx


Service Accounts and Database Mirroring

$
0
0

Service Accounts (Configure Database Mirroring Security Wizard)
http://msdn.microsoft.com/en-us/library/ms189434.aspx

When using Windows Authentication, if the server instances use different accounts, specify the service accounts for SQL Server. These service accounts must all be domain accounts (in the same or trusted domains).

If all the server instances use the same domain account or use certificate-based authentication, leave the fields blank. Simply click Finish, and the wizard automatically configures the accounts based on the account of the current wizard.

————————————————————————————————

1.Both of Principal and Mirroring SQL service accounts can be domain accounts (in the same or trusted domains)
2.Both of Principal and Mirroring SQL service accounts can be local accounts.
3.If principal SQL Server service account is a domain account and mirroring SQL Server service account is a local account, you may encounter this warning and error:

如果你在服務帳戶頁籤,輸入SQL Server啟動帳戶,開始設定後會出現以下警告:


啟動鏡像則可能會出現以下錯誤:

The server network address “TCP://myserver.domain.domain.domain.com:5022″ can not be reached or does not exist.
Check the network address name and that the ports for the local and remote endpoints are operational.
(Microsoft SQL Server, Error:1418)


From ERRORLOG
2013-09-08 00:27:18.13 Logon       Database Mirroring login attempt failed with error: ‘Connection handshake failed. An OS call failed: (8009030c) 0x8009030c(登入嘗試失敗). State 67.’.  [CLIENT: fe80::3478:8ea7:fceb:bae5%11]
2013-09-08 00:27:18.14 spid32s     Error: 1474, Severity: 16, State: 1.
2013-09-08 00:27:18.14 spid32s     Database mirroring connection error 5 ‘Connection handshake failed. An OS call failed: (8009030c) 0x8009030c(登入嘗試失敗). State 67.’ for ‘TCP://MirrorServer:5022′.
2013-09-08 00:27:20.54 Logon       Database Mirroring login attempt failed with error: ‘Connection handshake failed. An OS call failed: (8009030c) 0x8009030c(登入嘗試失敗). State 67.’.  [CLIENT: fe80::3478:8ea7:fceb:bae5%11]
2013-09-08 00:27:21.03 Logon       Database Mirroring login attempt failed with error: ‘Connection handshake failed. An OS call failed: (8009030c) 0x8009030c(登入嘗試失敗). State 67.’.  [CLIENT: fe80::3478:8ea7:fceb:bae5%11]
2013-09-08 00:27:22.06 Logon       Database Mirroring login attempt failed with error: ‘Connection handshake failed. An OS call failed: (8009030c) 0x8009030c(登入嘗試失敗). State 67.’.  [CLIENT: fe80::3478:8ea7:fceb:bae5%11]
2013-09-08 00:27:24.06 Logon       Database Mirroring login attempt failed with error: ‘Connection handshake failed. An OS call failed: (8009030c) 0x8009030c(登入嘗試失敗). State 67.’.  [CLIENT: fe80::3478:8ea7:fceb:bae5%11]
2013-09-08 00:27:26.59 Logon       Database Mirroring login attempt failed with error: ‘Connection handshake failed. An OS call failed: (8009030c) 0x8009030c(登入嘗試失敗). State 67.’.  [CLIENT: fe80::3478:8ea7:fceb:bae5%11]
2013-09-08 00:27:29.09 Logon       Database Mirroring login attempt failed with error: ‘Connection handshake failed. An OS call failed: (8009030c) 0x8009030c(登入嘗試失敗). State 67.’.  [CLIENT: fe80::3478:8ea7:fceb:bae5%11]
2013-09-08 00:27:31.62 Logon       Database Mirroring login attempt failed with error: ‘Connection handshake failed. An OS call failed: (8009030c) 0x8009030c(登入嘗試失敗). State 67.’.  [CLIENT: fe80::3478:8ea7:fceb:bae5%11]
2013-09-08 00:27:34.11 Logon       Database Mirroring login attempt failed with error: ‘Connection handshake failed. An OS call failed: (8009030c) 0x8009030c(登入嘗試失敗). State 67.’.  [CLIENT: fe80::3478:8ea7:fceb:bae5%11]
2013-09-08 00:27:36.63 Logon       Database Mirroring login attempt failed with error: ‘Connection handshake failed. An OS call failed: (8009030c) 0x8009030c(登入嘗試失敗). State 67.’.  [CLIENT: fe80::3478:8ea7:fceb:bae5%11]
2013-09-08 00:27:38.02 spid30s     錯誤: 1443,嚴重性: 16,狀態: 2。
2013-09-08 00:27:38.02 spid30s     Database mirroring has been terminated for database ‘MyDB’. This is an informational message only. No user action is required.

即使此時ping對方與telnet對方都沒有問題,還是可能會出現以上錯誤。

[RESOLUTION]
configure Database Mirroring with certificate or change both service account to local account.

Setting Up SQL Server 2008 R2 Database Mirroring with Certificate step by step in a Workgroup

Setting Up SQL Server 2008 R2 Database Mirroring in a Workgroup

Setting Up SQL Server 2008 R2 Database Mirroring in a Workgroup

$
0
0

1.Verify SQL Server service account and configure SQL Server Login for Database Mirroring

(1)SQL Server service account

Principal Server SQL Server service account is local account name “SQLServer”

Mirroring Server SQL Server service account is local account name “SQLService”

(2)create a local account “SQLservice” on Principal Server

create a login for local account “SQLservice”

(3)create a local account “SQLServer” on Mirroring Server

create a login for local account “SQLServer”


2.Prepare Mirroring Database

3.Setup Database Mirroring

(1)在設定的”服務帳戶”的步驟,無須輸入任何帳戶,保留空白。

(2)設定成功後,不要啟動鏡像(Do not start Mirroring)。

(3)Grant Connect permission to Mirroring service account “SQLservice”

 GRANT CONNECT ON ENDPOINT::[DBM_Endpoint] TO [SQL2K8R2M1\SQLservice]
GO


(4)Grant Connect permission to Principal service account “SQLServer”

 GRANT CONNECT ON ENDPOINT::[DBM_Endpoint] TO [SQL2K8R2M2\SQLServer]
GO


(5)Start Mirroring

(6)click [Yes]

(7)finish


Query SQL Server backup history and restore history records

$
0
0


1.使用以下TSQL語法查詢備份檔紀錄

SELECT 
bs.backup_set_id,
bs.database_name,
bs.backup_start_date,
bs.backup_finish_date,
CAST(CAST(bs.backup_size/1000000 AS INT) AS VARCHAR(14)) + ' ' + 'MB' AS [Size],
CAST(DATEDIFF(second, bs.backup_start_date,
bs.backup_finish_date) AS VARCHAR(4)) + ' ' + 'Seconds' [TimeTaken],
CASE bs.[type]
WHEN 'D' THEN 'Full Backup'
WHEN 'I' THEN 'Differential Backup'
WHEN 'L' THEN 'TLog Backup'
WHEN 'F' THEN 'File or filegroup'
WHEN 'G' THEN 'Differential file'
WHEN 'P' THEN 'Partial'
WHEN 'Q' THEN 'Differential Partial'
END AS BackupType,
bmf.physical_device_name,
CAST(bs.first_lsn AS VARCHAR(50)) AS first_lsn,
CAST(bs.last_lsn AS VARCHAR(50)) AS last_lsn,
bs.server_name,
bs.recovery_model
From msdb.dbo.backupset bs
INNER JOIN msdb.dbo.backupmediafamily bmf
ON bs.media_set_id = bmf.media_set_id
ORDER BY bs.server_name,bs.database_name,bs.backup_start_date;
GO

透過SERVER_NAME欄位確認該備份檔是否是在這台SQL Server上執行的備份

如果SERVER_NAME欄位顯示別台SQL Server主機名稱,表示這個備份檔是從別台SQL Server複製過來並且在這台執行過RESTORE


2.使用以下TSQL查詢還原紀錄

SELECT rs.[restore_history_id]
,rs.[restore_date]
,rs.[destination_database_name]
,bmf.physical_device_name
,rs.[user_name]
,rs.[backup_set_id]
,CASE rs.[restore_type]
WHEN 'D' THEN 'Database'
WHEN 'I' THEN 'Differential'
WHEN 'L' THEN 'Log'
WHEN 'F' THEN 'File'
WHEN 'G' THEN 'Filegroup'
WHEN 'V' THEN 'Verifyonlyl'
END AS RestoreType
,rs.[replace]
,rs.[recovery]
,rs.[restart]
,rs.[stop_at]
,rs.[device_count]
,rs.[stop_at_mark_name]
,rs.[stop_before]
FROM [msdb].[dbo].[restorehistory] rs
inner join [msdb].[dbo].[backupset] bs
on rs.backup_set_id = bs.media_set_id
INNER JOIN msdb.dbo.backupmediafamily bmf
ON bs.media_set_id = bmf.media_set_id
GO
 

PS.RESTORE操作會寫入backupset與backupmediafamily資料表,紀錄還原所使用的備份檔資訊


How to create a failover cluster

$
0
0

1.In the Failover Cluster Manager snap-in, confirm that Failover Cluster Manager is selected and then, under Management, click Create a Cluster.

2.Follow the instructions in the wizard to specify:

  • The servers to include in the cluster.
  • The name of the cluster.
  • Any IP address information that is not automatically supplied by your DHCP settings.


3.After the wizard runs and the Summary page appears, if you want to view a report of the tasks that the wizard performed, click View Report.

To view the report after you close the wizard, see the following folder, where SystemRoot is the location of the operating system (for example, C:\Windows):

SystemRoot\Cluster\Reports\

[Reference]

Create a New Failover Cluster

http://technet.microsoft.com/en-us/library/cc755129.aspx


AlwaysOn Availability Groups learning resources

$
0
0

Overview of AlwaysOn Availability Groups (SQL Server)
http://msdn.microsoft.com/en-us/library/ff877884.aspx
Prerequisites, Restrictions, and Recommendations for AlwaysOn Availability Groups (SQL Server)
http://msdn.microsoft.com/en-us/library/ff878487.aspx

SQL AlwaysOn Team Blog
http://blogs.msdn.com/b/sqlalwayson/
SQL Server Customer Advisory Team
http://blogs.msdn.com/b/sqlcat/

MSDN Blogs  >  Brad Chen’s SQL Server Blog   >  All Tags  >  alwayson
http://blogs.msdn.com/b/bradchen/archive/tags/alwayson/

AlwaysOn Architecture Guide: Building a High Availability and Disaster Recovery Solution by Using Failover Cluster Instances and Availability Groups
http://msdn.microsoft.com/en-us/library/jj215886.aspx
[Building a High Availability and Disaster Recovery Solution using AlwaysOn Availability Groups.docx]

SQL Server 2012 AlwaysOn: Multisite Failover Cluster Instance
http://msdn.microsoft.com/en-us/library/hh750283.aspx
[SQLServer2012_MultisiteFailoverCluster.docx]

SQL Server High Availability and Disaster Recovery for SAP Deployment at QR: A Technical Case Study
http://download.microsoft.com/download/d/9/4/d948f981-926e-40fa-a026-5bfcf076d9b9/SQLServer_HADR_QR.docx

SQL Server and SQL Server Agent Service Account(Startup Account) and Permissions

$
0
0

SQL Server and SQL Server Agent service account(Startup Account) and Permissions

1.Does service account need sysadmin role?

 [SQL Server(Database Engine)]
 沒有文件說明一定需要sysadmin role
 no document found saying No or Yes explicitly about if sql service account need to be a member of sysdamin role
 (1)SQL 2005,service account is always granted with sysadmin by default (e.g. if we pick Local System as our service account, then we would have NT Authority/System having sysadmin in the SQL instance).
   How to change the SQL Server or SQL Server Agent service account without using SQL Enterprise Manager in SQL Server 2000 or SQL Server Configuration Manager in SQL Server 2005
   http://support.microsoft.com/kb/283811
   Base on KB283811 for SQL 2005, When changing new SQL service Account, sysadmin role is a must

 (2)SQL 2008,in Windows 2008 R2, Virtual Accounts(SQL Server Per-service SID)=NT SERVICE\<SERVICENAME>is always granted with sysadmin by default
   Configure Windows Service Accounts and Permissions
   http://msdn.microsoft.com/en-us/library/ms143504.aspx

 基於以上文件,建議將SQL Server service accoount(startup account)加入sysadmin role


 [SQL Server Agent]
 雖然SQL Server Agent service的啟動帳戶不是sysadmin role也能啟動SQL Server Agent,但可能會限制某些功能。

 (1)必須是sysadmin role
   From Books Online and Training kit 70-462
   The SQL Server Agent service startup account must be a member of the SQL Server sysadmin fixed server role, and if multiserver job processing is used, the account must also be a member of the msdb database role TargetServersRole on the master server.
   Set the Service Startup Account for SQL Server Agent (SQL Server Configuration Manager)
   http://msdn.microsoft.com/en-us/library/ms186264.aspx

   From Training kit 70-462
 (2)The account you assign for the SQL Server Agent service during installation is added automatically to the sysadmin fixed server role during installation.
   PS.但是經測試SQL 2008 R2安裝過程時所指定一個local or domain user account也不會自動加入sysadmin role

 (3)If you modify the account used by the SQL Server Agent service at a later point, SQL Server Configuration Manager does not automatically add the account to sysadmin role.
   PS.透過SQL Server Configuration Manager修改啟動帳戶,只會給予需要的權限,不會自動加sysadmin role


2.Does service account need Windows Administrator Permission?(local Administrators Group member)

 [SQL Server(Database Engine)]
 (1)不需要一定是Administrators group member
 (2)視需求選擇其中一種account
    Domain User Account
    Local User Account
    Local Service Account(NT AUTHORITY\LOCAL SERVICE)
    Network Service Account(NT AUTHORITY\NETWORK SERVICE)
    Local System Account(NT AUTHORITY\SYSTEM)

    Windows 7 and Windows Server 2008 R2 have two new types of service accounts called managed service accounts (MSA) and virtual accounts.
    Virtual Accounts
    Managed Service Accounts
  
    Configure Windows Service Accounts and Permissions
    http://msdn.microsoft.com/en-us/library/ms143504.aspx


 [SQL Server Agent]
 (1)Beginning with SQL 2005, 不需要是Administrators Group member
    Beginning with SQL Server 2005, SQL Server Agent no longer requires that the service startup account be a member of the Microsoft Administrators group.
    However, there are some restrictions associated with using a non-administrative account for the SQL Server Agent service. For more information, see Service Account Types Supported for SQL Server Agent.
    http://msdn.microsoft.com/en-us/library/ms345380(v=sql.105).aspx

 (2)如果是domain account可能需要以下權限
    From Training kit 70-462
    When choosing to use a domain-based security account, ensure that the account has the following permissions:
    ■ The logon as a service right. You assign this right by using Group Policy.
    ■ Membership of the Pre-Windows 2000 Compatible Access security group at the domain level. If you do not add the domain-based security account used for the SQL Server Agent service to this group, any jobs owned by domain users who are not members of the local Administrators group on the host computer will fail.


PS.

1.Default provisioning login after SQL Server setup finish

2.Default provisioning windows groups

Oracle Client for SQL Server

$
0
0

Oracle Client for SQL Server

Oracle Client Support Windows version Document / Download
Oracle 12c

for Microsoft Windows x64 (64-Bit)

•Windows Server 2008 x64 and Windows Server 2008 R2 x64 – Standard, Enterprise, Datacenter, Web, and Foundation editions.

•Windows 7 x64 – Professional, Enterprise, and Ultimate editions

•Windows 8 x64 and Windows 8.1 x64 – Pro and Enterprise editions

•Windows Server 2012 x64 and Windows Server 2012 R2 x64 – Standard, Datacenter, Essentials, and Foundation editions


Client Quick Installation Guide

12c Release 1 (12.1) for Microsoft Windows x64 (64-Bit)

http://docs.oracle.com/database/121/NXCQI/toc.htm


Oracle Database 12c Release 1 (12.1.0.2.0)

http://www.oracle.com/technetwork/database/enterprise-edition/downloads/database12c-win64-download-2297732.html


Oracle 11g R2

for Microsoft Windows x64 (64-Bit)

•Windows Server 2003 – all x64 editions

•Windows Server 2003 R2 – all x64 editions

•Windows XP Professional x64

•Windows Vista x64 – Business, Enterprise, and Ultimate editions

•Windows Server 2008 x64 – Standard, Enterprise, Datacenter, and Web editions.

•Windows Server 2008 R2 x64 – Standard, Enterprise, Datacenter, Web, and Foundation editions.

•Windows 7 x64 – Professional, Enterprise, and Ultimate editions

•Windows 8 x64 – Pro and Enterprise editions

•Windows 8.1 x64 – Pro and Enterprise editions

•Windows Server 2012 x64 and Windows Server 2012 R2 x64 – Standard, Datacenter, Essentials, and Foundation editions


Client Quick Installation Guide

11g Release 2 (11.2) for Microsoft Windows x64 (64-Bit)

http://docs.oracle.com/cd/E11882_01/install.112/e49700/toc.htm


Oracle Database 11g Release 2 (11.2.0.1.0)

http://www.oracle.com/technetwork/database/enterprise-edition/downloads/112010-win64soft-094461.html


Oracle 10g R2

for Microsoft Windows x64 (64-Bit)

•Windows Server 2003, Standard x64 Edition

•Windows Server 2003, Enterprise x64 Edition

•Windows Server 2003, Datacenter x64 Edition

•Windows XP Professional x64 Edition

•Windows Vista x64, Service Pack 1 – Business, Enterprise, and Ultimate editions

•Windows Server 2008 x64 – Standard, Enterprise, Datacenter, Web, Standard without Hyper-V, Enterprise without Hyper-V, and Datacenter without Hyper-V editions

The specific operating system components that are not supported are Windows Server 2008 x64 Hyper-V and Server Core.


Database Client Installation Guide for Microsoft Windows (x64)

http://docs.oracle.com/cd/B19306_01/install.102/b15684/toc.htm


Viewing all 62 articles
Browse latest View live